In My New Mom Era Embroidery Design Review
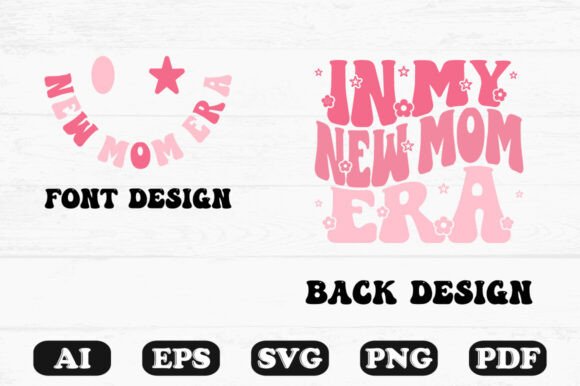
As a designer who spends hours testing files before they ever touch a customer’s garment, I have a soft spot for themes that feel both current and personal. The In My New Mom Era Design for Apparel caught my eye immediately. It’s not just a trendy phrase; the combination of soft pink flowers, tiny baby footprints, and that retro wavy typography over a black background creates a mood that is equal parts celebratory and tender. The first thing I thought was: this has serious potential for a custom baby shower gift, maybe a zippered pouch or a cozy sweatshirt that a new mom would actually live in. But as any embroidery artist knows, a pretty graphic and a stitch-ready design are two very different things. I sat down with the SVG bundle, envisioned it on a dozen different blanks, and walked through every step of what it would take to turn this into a finished embroidery project that looks as good stitched as it does on screen.
Seeing the Design Through an Embroidery Lens
Right away, the vintage wavy text gives the design a hand-drawn personality. The letters are bold but not too thick, and the slight curve in “In My New Mom Era” feels like a nod to old-school concert tees or retro patches. That wavy style is a double-edged sword for machine embroidery. On one hand, it adds character that stiff, straight text simply cannot match. On the other hand, if the digitizing isn’t done carefully, tiny jagged edges can appear along the waves, especially when using satin stitch columns. I’d want to see this digitized with a smooth underlay and a stitch angle that follows the letter curve, not just a default horizontal fill. The baby footprints are delicate, and that’s where the detail level matters most. In the SVG, they’re small but clear, with five tiny toes and a subtle arch. In thread, those toes could easily blur together if the stitch density is too high or the design is shrunk too small. I’d recommend a minimum size of around 3.5 inches wide for the entire design to keep the footprints readable, and I’d probably use a fine 60-weight thread for the toe details, or convert them to a minimalist running stitch that won’t clump on soft fabric.
The flowers framing the text add a gentle, almost botanical feel. They’re rendered in pink hues that pop against the black background. If I were stitching this on a black garment, I might actually skip the background fill entirely and let the fabric serve as the dark backdrop. That saves stitch time, reduces stiffness, and feels more professional. On a light-colored tote or a pastel onesie, though, that black rectangle becomes a focal point, and I’d need to consider whether a dense fill stitch would make the fabric too stiff. An applique approach could work beautifully here: cut a black fabric shape, stitch it down with a tack-down stitch, then embroider the pink elements on top. That would give a clean, bold contrast without the weight of a full fill stitch. The SVG bundle includes the design as a whole, so it’s up to the digitizer to separate those layers thoughtfully.
Where This Design Really Shines
I immediately pictured a few real-life projects where the In My New Mom Era Design for Apparel would feel right at home. A relaxed-fit sweatshirt in a soft blush or heather gray, with the design stitched on the chest, strikes me as a perfect gift for a baby shower or a mom’s first Mother’s Day. Because the black background is part of the graphic, it gives the design a badge-like quality, almost like a statement patch. That makes it ideal for a tote bag design, too. I tested the idea on a canvas tote in my mind: the black base would anchor the design against the natural fabric, and the pink flowers would stay vibrant. For a smaller product, like a baby bib or a cap, I’d be cautious. The level of detail in the flowers and footprints could get lost on a tiny hoop. I’d recommend using the design on a medium to large hoop, at least 4x4 inches but preferably 5x7 or larger, to keep everything crisp. The wavy text alone might be extracted and used as a smaller element on a cuff or a pocket, but the full bundle works best on pieces with a generous print or embroidery area.
Another use case I keep coming back to is a decorative pillow cover for a nursery. Imagine a soft cream linen pillow with this design centered, surrounded by a simple running stitch border. The black background would act like a framed piece of art, and the pink hues would tie into a baby girl’s room without being overwhelmingly sweet. The vintage vibe also makes it a smart choice for boutique branding. A small shop selling handmade baby items could stitch this on a hang tag, a denim jacket, or even a canvas apron for the mompreneur herself. The retro wavy design crosses over into the kind of graphic that feels good on a t-shirt, too, and I can see it being a popular listing for Etsy sellers who offer personalized mom-themed apparel. The customer would feel an instant connection to the phrase, and the stitched version would elevate it beyond a simple screen print.
Practical Performance on Different Materials
When I evaluate any embroidery design, I mentally run through a checklist of fabrics and their quirks. On a sturdy cotton sweatshirt, this design would stitch beautifully with a medium-weight cutaway stabilizer. The black background fill, if I choose to stitch it, would need a lower density to avoid puckering. On a stretchy onesie or a thin t-shirt, I’d add a water-soluble topper to keep the small letters from sinking into the fabric. The footprints are the first thing to check on a test stitch. If the toe dots disappear, I’d increase the size slightly or simplify the digitizing to use a single running line for the footprint outline. On a textured fabric like a waffle knit or a towel, the black background could become a challenge because the fill stitch might not sit flat. In that case, I’d opt for the applique method, or I’d simply omit the background and let the pink elements float on the fabric with a light outline. For a cap, the curved surface would distort the wavy text unless I digitize with a slight arc that matches the cap’s curve. I’d probably save this design for flat or gently curved surfaces, like tote bags, jacket backs, or framed hoop art, to preserve the original layout.
Dark fabrics are a friend here. The pink thread will read clearly on black, navy, or charcoal, and the design’s contrast is already built into the color palette. On a light fabric, the black background will need to be extremely dense to look solid, which can make the final product feel heavy. I’d strongly suggest a test stitch on a scrap of the exact fabric, especially if you’re planning to sell the finished product. Wash it a few times, too. The retro wavy design is meant to be worn, not just admired, and new moms are going to throw that sweatshirt in the laundry. A well-digitized file with proper underlay and quality thread will hold up beautifully. I’d pick a polyester thread for the pink flowers to keep the sheen soft, and a matte black for the background to avoid shine that cheapens the look.
What This Design Brings to a Craft Business
From a seller’s perspective, the In My New Mom Era Design for Apparel has a lot of built-in emotional appeal. Phrases like “new mom era” tap into a life stage that people want to celebrate and mark. When you turn that phrase into a stitched product, you’re offering something that feels more permanent and thoughtful than a mass-produced gift. That perceived value translates directly into higher price points and repeat customers. I’d bundle a finished sweatshirt with a coordinating baby onesie that uses just the footprints or a single flower, creating a mini collection. The vintage retro wavy design also fits the ongoing trend of 70s-inspired typography, so it’s not a one-season wonder. It’s the kind of design that can sit in your shop for years, appealing to baby showers, Mother’s Day, and even “push present” gift buyers.
Credibility matters, too. When a customer sees a clean stitch-out with no gaps, no puckering, and a thread color that matches the mockup, they trust your brand. I always photograph the finished product on a person, not just a flat lay, so the wavy text and the pink hues look alive. The black background gives a nice frame for a product photo, especially on a white surface. For digital product sellers, this SVG bundle is a starting point. You’ll need to convert it to an embroidery file, whether that’s a PES, DST, or other format, and you’ll need to digitize it with the right stitch types. Since the listing doesn’t include a pre-digitized embroidery file, you must check the licensing terms. Make sure the commercial use rights allow you to sell finished physical items with the design, not just the digital graphic. Most SVG bundles for t-shirt designs do allow this, but it’s your responsibility to verify.
Small Details That Make or Break the Stitch-Out
I want to focus on the lettering because it’s the heart of the design. The “In My New Mom Era” text is stylized with a wavy baseline, and the vintage feel means the letters have varying thicknesses. In embroidery, those thick-to-thin transitions can cause the thread to pull or the fabric to show through if the satin stitch isn’t perfectly angled. I’d digitize the thick parts with a wider satin column and the thin parts with a narrower one, and I’d use an edge run underlay to keep the edges crisp. The word “Era” is particularly important because it’s the focal point of the era theme. If that stitches out blurry, the whole design loses impact. I’d also check the spacing between the flowers and the text. If the petals are too close to the letters, the stitches might overlap in a way that confuses the eye. A tiny bit of breathing room, even just a millimeter of negative space, makes a huge difference in the finished product.
The baby footprints, as I mentioned, are delicate. In a smaller size, they could be reduced to a simple silhouette without the toe details. That’s a creative choice, not a fault. Sometimes a minimalist footprint reads better than a cluttered one. The pink hues are described as part of the design, but in embroidery, you have full control over thread colors. I’d use a soft blush pink, a medium rose, and a deeper berry for the flowers to create depth. The dominance of pink on black means the design will look distinctly feminine, which is perfect for the intended audience. If you wanted to offer a gender-neutral version, you could swap the flowers for a soft sage green or a buttery yellow, but the original palette is so well-suited to the new mom theme that I’d keep it as is.
Before You Stitch: A Quick Reality Check
I always advise makers to do a small test run on the exact fabric they plan to sell. For this design, I’d set up a 5x7 hoop, hoop a piece of medium-weight cotton with a tear-away stabilizer, and stitch the design at full size. Then I’d inspect the back. If the black fill is pulling or the fabric is distorted, I’d reduce the density by 10% and try again. The vintage retro wavy design should look intentional, not strained. If you’re planning to use this on a product that gets heavy wear, like a tote bag that’ll carry diapers and bottles, add a layer of fusible stabilizer to reinforce the area. The design’s black background also makes it a candidate for a neat trick: stitch the black as a satin border around the shape instead of a full fill, creating a patch-like outline that saves thread and time while still giving that framed effect.
Color contrast is everything. If you stitch the pink flowers on a black background, they’ll glow. But if you forget to test the thread on the actual fabric, you might find the pink looks muddy on a cream fabric or too bright on a heathered gray. Always run a color test. And don’t overlook the printable mockup potential. Even if you’re not selling the embroidery digitized file, the SVG bundle can be used to create digital previews for your shop. Showing a realistic mockup of the design on a sweatshirt, with the black background and pink accents, can help customers visualize the final product and increase buyer engagement.
The In My New Mom Era Design for Apparel is a thoughtfully composed graphic that translates into a sweet, wearable embroidery project. It’s not a beginner’s one-click file, but for a designer who understands digitizing, fabric behavior, and market trends, it’s a valuable asset. The vintage wavy text, the floral softness, and the tiny footprints combine to tell a story that new moms will cherish. Whether you stitch it on a tote, a sweatshirt, a pillow, or a patch, the design rewards careful planning and a bit of creative thinking. My one piece of parting advice: slow down, test twice, and pay attention to those little toes. That’s where the charm lives.